Capture, Create and 3D Print
Capture, Create and 3D-Print anything you want with simple tools that are available to you for free today! It is really pretty easy and everyone can have lots of fun with this.
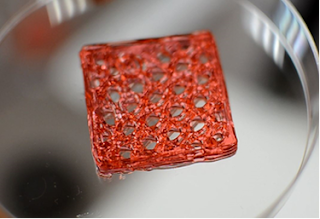
This is our first 3D printed scanned model of Snowy the bunny rabbit:
Here, I will describe a mini-tutorial on how to Capture, Create and 3D Print anything you want. Using simple and FREE software tools available in the market today, you can now make a 3D model of pretty much anything you can photograph - pretty cool stuff!
I will illustrate this process using an iPhone. Alternatively, if you do not have an iOS device you can download the Autodesk 123D Catch software onto your computer, capture images using a camera and upload all your captured images onto the program.
Here is how you do it with your iPhone/iPad
Step 1: Download 123D Catch on your iPhone/iPad device
Step 2: Launch the app and create an account on 123D Catch
Step 3: Start a new capture by pressing the "+" button on the top right corner
Step 4: Follow instructions on 123D Catch to capture the best quality and consistent set of images
Step 5: Once you are finished capturing all the images, review and submit (you can edit any one that you do not like and retake them)
Step 6: Wait for it to get processed - this may take a few hours... and then come back to review the finished product. Decide if you want to accept or delete the model, most models aren't going to be perfect so some editing will be needed. Download the STL file once it is ready.
Step 7: To refine the model, use NetFabb Basic (it's FREE) so download this program first onto your computer.
Step 8: Open the program and load the STL file of your model. The first thing we want to do it probably to crop the model to create a solid and flat base for printing. You need to use the Cut tool here. First move the model to the origin by selecting Part --> Move then select the To Origin button on the dialog box and hit move. To create a flat button, drag the Z slider on the Cut tools on your right panel such that the blue line cuts off all the jagged and unwanted edges of your model. Execute by clicking Cut.
Step 9: Next you probably need to repair holes, use the Automatic Repair tool (represented by the red cross symbol). Press this button and select the Default repair.
Step 10: Export the repaired model as an STL file using Part --> Export --> STL. You are now ready to upload this file onto your 3D printer software and print!
This is our first 3D printed scanned model of Snowy the bunny rabbit:
 |
| Captured 3D model of Snowy the Bunny |
 |
| Polished and Refined Model of Snowy |
 |
| 3D printed models of Snowy the Bunny |
Here, I will describe a mini-tutorial on how to Capture, Create and 3D Print anything you want. Using simple and FREE software tools available in the market today, you can now make a 3D model of pretty much anything you can photograph - pretty cool stuff!
I will illustrate this process using an iPhone. Alternatively, if you do not have an iOS device you can download the Autodesk 123D Catch software onto your computer, capture images using a camera and upload all your captured images onto the program.
Here is how you do it with your iPhone/iPad
Step 1: Download 123D Catch on your iPhone/iPad device
Step 2: Launch the app and create an account on 123D Catch
Step 3: Start a new capture by pressing the "+" button on the top right corner
Step 4: Follow instructions on 123D Catch to capture the best quality and consistent set of images
Step 5: Once you are finished capturing all the images, review and submit (you can edit any one that you do not like and retake them)
Step 6: Wait for it to get processed - this may take a few hours... and then come back to review the finished product. Decide if you want to accept or delete the model, most models aren't going to be perfect so some editing will be needed. Download the STL file once it is ready.
Step 7: To refine the model, use NetFabb Basic (it's FREE) so download this program first onto your computer.
Step 8: Open the program and load the STL file of your model. The first thing we want to do it probably to crop the model to create a solid and flat base for printing. You need to use the Cut tool here. First move the model to the origin by selecting Part --> Move then select the To Origin button on the dialog box and hit move. To create a flat button, drag the Z slider on the Cut tools on your right panel such that the blue line cuts off all the jagged and unwanted edges of your model. Execute by clicking Cut.
Step 9: Next you probably need to repair holes, use the Automatic Repair tool (represented by the red cross symbol). Press this button and select the Default repair.
Step 10: Export the repaired model as an STL file using Part --> Export --> STL. You are now ready to upload this file onto your 3D printer software and print!


Comments
Post a Comment